MORE Catalog How to: create a MORE account
Online Catalog Basics
Welcome to the new MORE online Catalog! This tutorial will show you how to:
- register, create an account and a pin
- move lists over from the old catalog
- create a hold and manage your account
- use new ways to save and share
- easily explore and find what you’re looking for
1. Open your browser and go to more.lib.wi.us
The MORE catalog works on Firefox, Chrome and most other popular browsers.
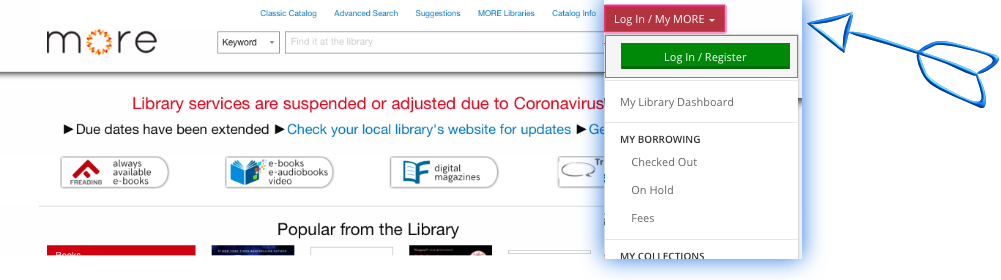
2. Click on the red Login/MyMore button.
Select the red “Log In / My More” button in the upper-right. When you click that box, the green “Log In / Register” button appears. Click that.
3. Enter your information.
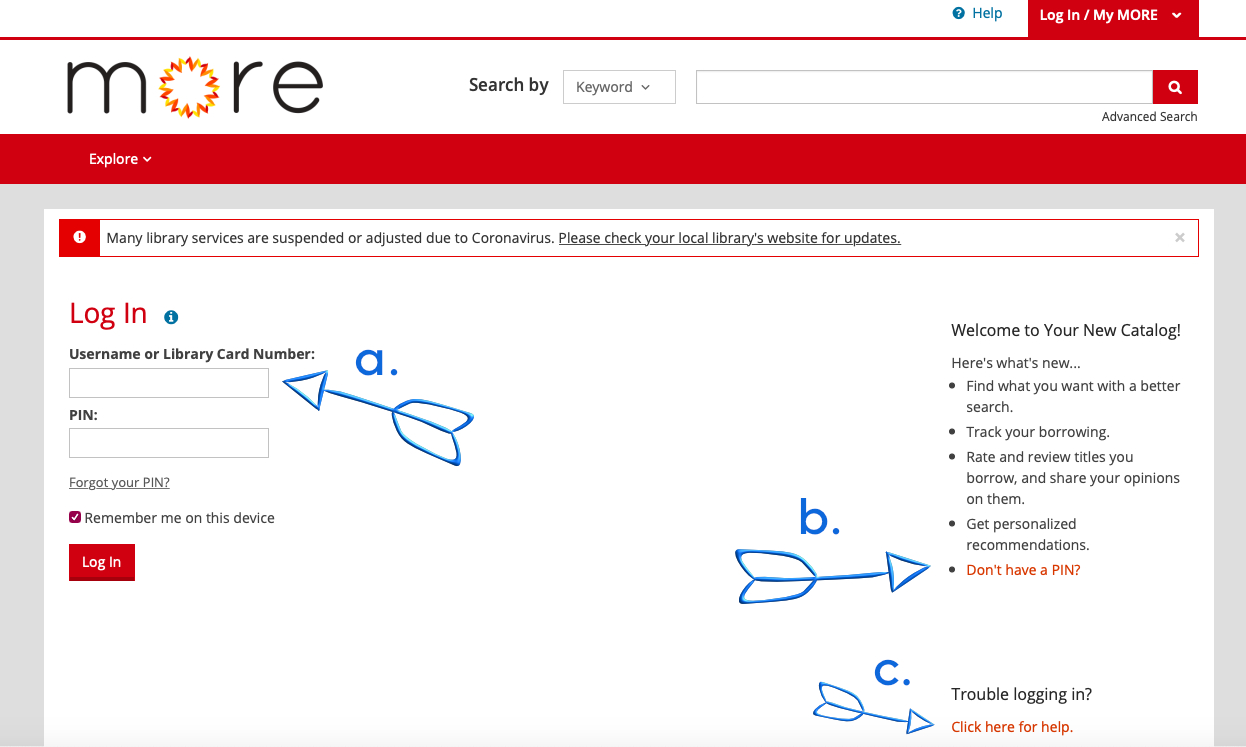
a. Type in your library card number from the back of your card–just the numbers, no spaces. Then type in your PIN.
If you’ve set a PIN before but have forgotten it, select the “Forgot your PIN?” link and follow the instructions to get a reset link by email. If the library doesn’t have an email address on file for you, you’ll need to contact your local library to reset your PIN. (How long will this take? During our current COVID-19 closing most libraries are monitoring voicemail and email, if not able to answer the phone directly, so probably not more than a day. When libraries are open, resetting should just take a few minutes.)
b. Don’t have a PIN? Use the “Don’t have a PIN” link and follow the instructions to set a 4-digit PIN. Then come back to this page to continue.
c. You can always get help! If your librarian isn’t available, click the help link.
Click the red “log in” button.
4. Click the red button to Continue to Account Setup.
You’ll see the information we have on file for you already. This is the email address that we’ll use to send reminders and other information, so it’s important that it’s correct. You can update it now if needed. If you notice any of the other information is wrong you can call or visit your library to update the information they have on file, but you don’t have to do that now.
Click the red “continue” button.
5. Create a username.
It should be short and easy to remember, and you can change it later if you want. I’m going to use LoveMyMORE and the last four digits of my library card number 4873. Remember that your user name will show up on comments and reviews you create in the new catalog. Write it down somewhere for future reference.
When you log in in the future, you can use your user name or your library card number—it’s your choice.
6. Read and accept the terms of conditions and click the red “Complete Account Setup” button.
You might be asked to save your login information. If you’re on your own private device, you can choose to save your login now. Don’t save if you’re on a public computer.
There are a few addition steps that will set up your borrowing history and import your lists. I’ll walk you through setting those up now. (If you didn’t save your reading history or create lists in the old catalog, you can skip steps 7 and 8.)
7. Enable Borrowing History.
The new catalog will keep track of titles you check out. You can turn it off any time.
If you previously opted in to saving your reading history, those titles will appear when you Enable Borrowing History here.
8. Import old saved lists to Shelves.
If you previously created saved lists, you can Import List Items here. If you had multiple lists, all the titles will land on your “For Later” shelf.
9. Set your preferred locations.
Over on the right, you can select up to three preferred library locations, a brand new feature. When you’re logged in and searching, the catalog will tell you if a title is available at one of your preferred locations.
10. Display Defaults.
Display defaults let you control what you see when you’re online. “Shared content” from other users may contain spoilers and content that has been deemed offensive by other users. If you want to screen out that kind of content, check these boxes.
Click the red button that says “All Done? Explore Your New Catalog.” Your account is all set up!
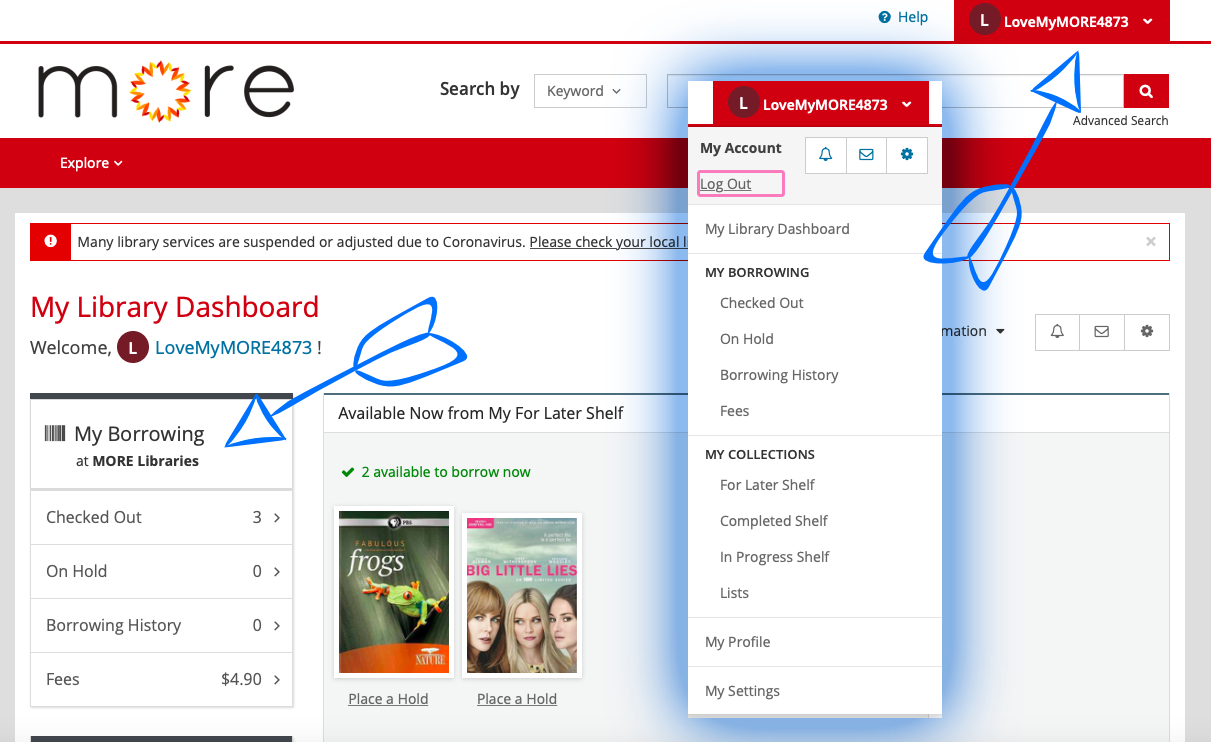
Your Dashboard
This is your Library Dashboard, where you can see an overview of all your account activity. If you want to see your checkouts or holds, for example, select those options from the left side.
When you’re logged in, the button in the upper-right with your username in it works like a menu for your account, too, so no matter where you are on the catalog you can get to all of your account information.
If you’d prefer a video how-to, join Caroline from Ellsworth Public Library as she walks you through getting started.
For more about saving and searching, go to How to: Search, Save and Share
Download a pdf of How to Create a MORE Account