Printing in Sierra
General notes about Printing in Sierra
Printer settings are specific to both the Sierra login being used and the computer Sierra is installed on. All settings made and saved in Admin – Settings are retained for that login no matter what computer is being used. Those settings saved in File – Select Printer, however, depend on the printers installed on that particular computer. So, for example, if I need to use a different computer for a day, I would use my usual login and all the templates I selected would still be there and I wouldn’t need to change anything. I would need to go into File – Select Printer and choose one of the printers installed on this different computer for each of the print jobs I would need to use, most notably those for Print Templates.
It is not unusual for Sierra to lose saved settings for printing after a power outage, the Sierra Server being down or a Sierra upgrade. If this happens, follow the steps below to enter and save your settings again.
Notices
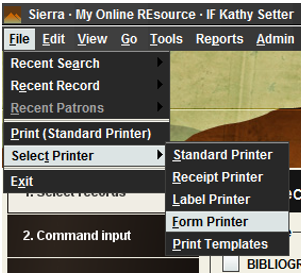
When notices (overdues, bills, paging lists and paging slips, hold pickups and cancellations, statements of charges) are printed, they use the Form Printer. To set the default printer, go to File – Select Printer – Form Printer.
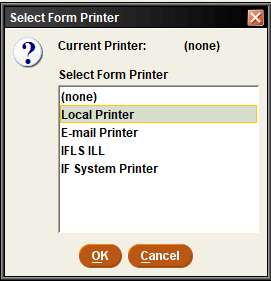
On the Select Form Printer pop-up, select the printer you want to use. Most often this will be the Local Printer; sometimes you will want to use the E-mail Printer if you want to send the notices to staff for review before deleting. Click OK.
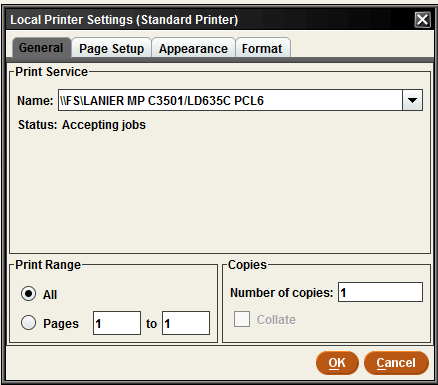
The local Printer Setting (Form Printer) window will appear. On the General tab, in the Name box, use the drop down to choose the printer you want to use. The printers that are installed on the computer you are using will be in the list. Once your printer is selected, click OK.
If you chose E-mail Printer, the pop-up will ask for the email address you want the notices sent to. This should be a general library email.
When you are in the Notices function and choose a notice type to run, when you click Prepare Notices you will be asked to confirm your printer choice. For more information on saving notice jobs, see the Notices page.
Sierra Records and Clear Holdshelf
Anything that is printed from a Sierra screen, including items generated when you clear the holdshelf, goes through the Standard Printer. This includes using the print icon in the upper right corner from any function in Sierra. To set this printer, go to File – Select Printer – Standard Printer. On the Select Standard Printer pop-up window, select Local Printer and click OK. In the Local Printer Settings pop-up, use the drop-down for the Name box to select the printer you want these jobs to go to. All printers installed on that workstation will be in the list. Once your printer is selected, click OK.
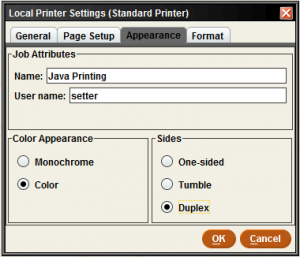
If there is something you want to print double-sided (and your standard printer supports that), go to the Appearance tab and under Sides, click the button before Duplex, then click OK.
Date Due Slips
Standard Due Slips
If you are using the standard date due slip system-generated when closing a circulation transaction, there are two parts to setting up date due slips. The first is designating the printer to use. Go to File – Select Printer – Receipt Printer. Select Local Printer and click OK. The Local Printer Settings (Receipt Printer) pop-up window wiill appear. On the General tab, select your receipt printer from the drop-down list in the Name field. Once that is done, click on the Format tab along the top of the pop-up window.
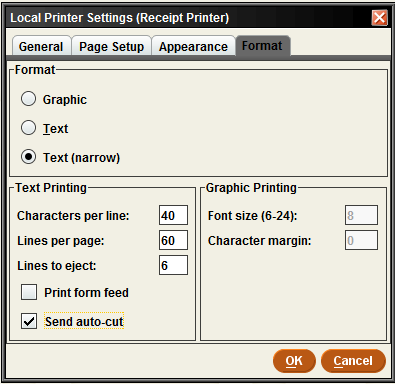
Under format, click in the Text (narrow) radio button. This will activate the text printing options below it. Fill in the characters per line at 40, the lines per page at 60, and the lines to eject at 6. The lines to eject is the amount of space added to the end of the slip so it is not cut off right at the last line of printing. You may want to adjust this up or down depending on the amount of space you prefer. If you have an auto-cut printer, be sure to check the box in front of Send auto-cut.
When finished, click OK. The window will close.
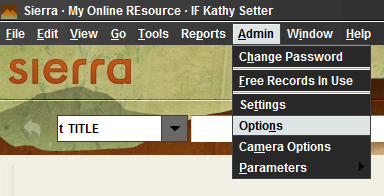
The second part of setting up date due slips is configuring what prints on the slip itself. This is done under Admin – Options.
Click on the Due Slip tab. Here you can enter what you want printed at the top of the due slip. You have 2 lines, maximum 40 characters each line. You can change these as frequently as you want to; you can use the second line to promote what’s happening at the library that month, for example.
Patron information on due slip should always be set to Neither. This prints out the .p number from the patron record, which can’t be used by anyone other than staff.
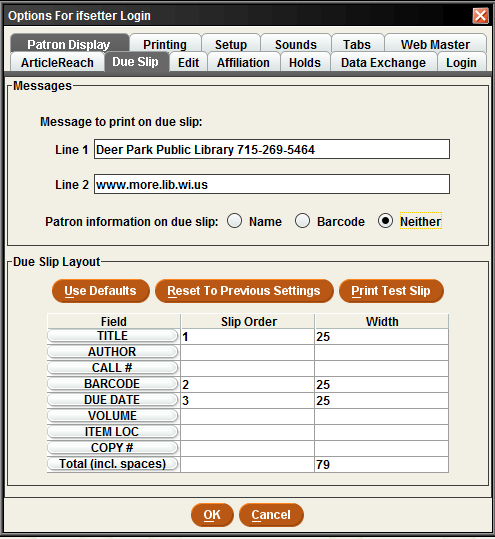
The Due Slip Layout specifies what information from each item being checked out is printed on the slip. In this example, the Title, Barcode and Due Date are printed. You can add Author or Volume if you think your patrons would find that helpful. Order the fields the way they should appear on the slip. For example, if adding the volume field (some libraries find this helpful for magazine checkouts), put number 2 in the slip order next to volume so it prints after title, change barcode to 3 and due date to 4.
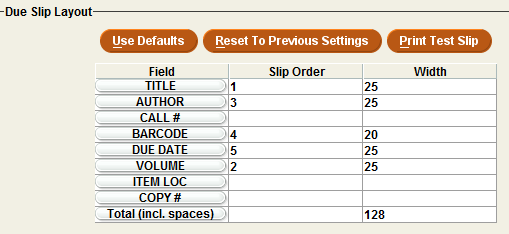
The width of the field must also be added; put 25 (that is the default) in that column in the volume line. The total will automatically adjust when a field is added. You can add another field if you wish, but the total width line cannot exceed 130. Adding author in addition to volume will take the total to 133 and you will not be allowed to save it. We know our barcodes are 14 digits, so you can safely change that width to 20 and you will be under the max.
Here is an example for Title, Volume, Author, Barcode and Due Date. Note: if a volume field doesn’t exist in the item record (or author field in the bib record), that field is skipped. When satisfied, click OK.
To test your slip layout, check out several different formats (book, DVD, magazine) to see how the slip prints. Make adjustments as desired.
Library specific due slips using Print Templates
If your library has requested a due slip with the value added statement or other personalized elements, you need to turn them on once MORE staff notifies you it is ready for use.
In Sierra, under your library’s general Circ login, go to Admin – Settings and click on the Print Templates tab. Change output type to Due Slip. You will have to scroll to the bottom of the list to find it. Click in the box in front of Use Print Templates. Find your library in the list in the right hand column. Click on it to highlight it, then click the top, left facing arrow to move it over to the left column under Preferred Templates. If there is anything else in the Preferred Templates column, move it over to the right so only your library is listed in the left column.
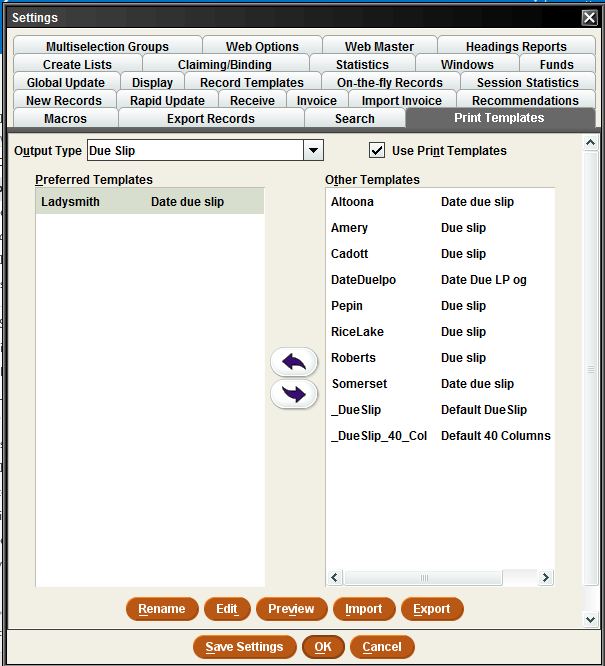
Click Save Settings. Click OK to close. That is all that is needed. From this point on all due slips will print in this format. If you have more than one circ station, you can either go through these same steps to turn it on for those workstations, or just log out and back in on those computers. This due slip setting will be set for the circ login no matter which workstation is being used.
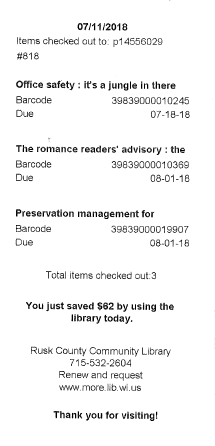
Here is an example of a print template due slip with the “You saved” statement:
Print Template Due Slip for Express Lane
If your library has an Express Lane self-check station, you can turn these print template due slips on so they also print at your self-check station. You will need a special login and password to access this; contact MORE staff for that. Once you have it, open your self-check as usual. In the barcode input box type 1234512345.

You will be asked for login and password. Use what MORE staff have given you. Click OK.
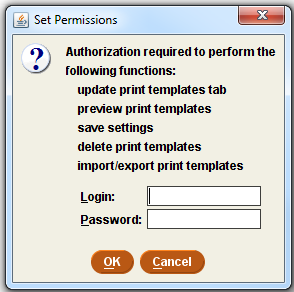
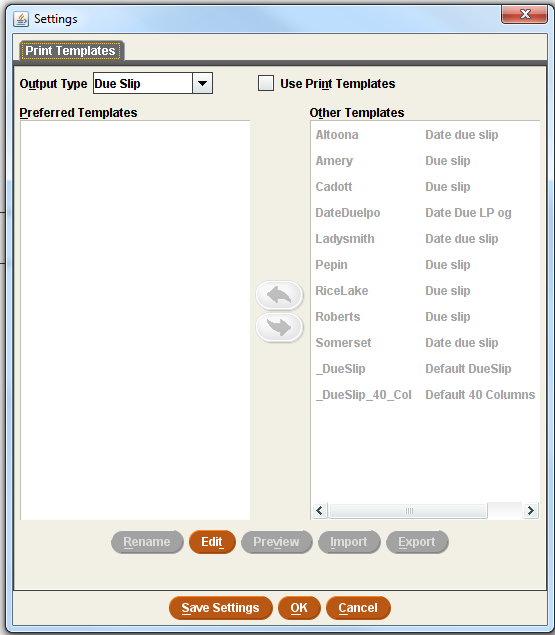
The Print Template Settings screen will pop up with Due Slip already in the Output type field. Click the box in front of Use Print Templates. Find your library in the right column. Click on it to highlight it, then click the top, left facing arrow to move it over to the left column under Preferred Templates. Click Save Settings, then OK to close. You will be back to the Welcome screen.
Log out of Express Lane and log back in to erase the special login used.
Holdshelf and Transit Slips
The Holdshelf slips and the Transit slips are both set up using the same steps. There are 2 parts: selecting which template to use, and designating the printer to send them to.
Holdshelf Slips
Go to Admin – Settings and click on the Print Templates tab.
In Output Type, use the down arrow to select Holdshelf slip. Check the box in front of Use Print Templates.
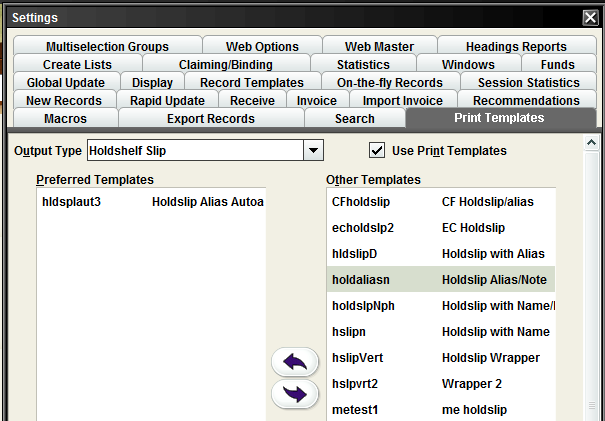
Choose the template to be used for your library’s holdshelf slips. It is not recommended to use patron names on holdshelf slips, therefore the templates currently in use by MORE libraries use the patron alias. The choices are:
hldslpaut3 – Holdship Alias Auto automatically generates the patron alias at the time of printing the slip. There is no need to enter an alias field in the patron record. This slip has at the top the reminder to patrons to check out the item. It is made up of the first 3 letters of the patron’s last name, the first two letters of the first name and the last 3 numbers of the patron barcode number.
hslpaliasn – Holdslip with Alias/Note prints the patron alias in large type at the top of the slip along with the text “Remember! You Must check out this item” – this is for libraries that have the alias field in the patron record, and who want an extra message for their patrons about checking out their holds.
hldslipD – Holdslip with Alias prints the patron alias in large type at the top of the slip – this is for libraries that have the alias field in patron records.
Special Holdshelf Slips for Curbside Service
These templates include alias, name, phone number, and “printed on” date
hsaliasNP – Holdslip Alias N/P If you have an alias field in the patron record, use this.
hsautoNP, Holdslip Auto N/P If you have the alias automatically generated at checkin, use this
Highlight the template to be used in the right column and click the top, left facing arrow between the columns to move it over under Preferred templates.
Then, at the bottom of that screen, use the down arrow for the Select Template field to select the name of the template. Make sure it appears in the box. Click Save Settings. Click OK to close.

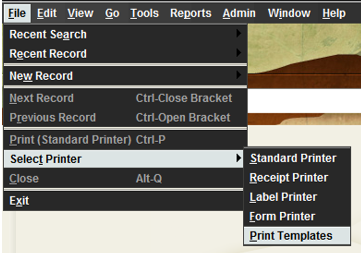
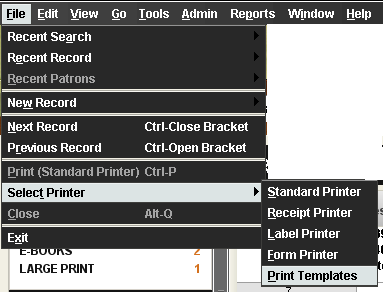
To set the printer to send the slips to, go to File – Select Printer – Print Templates (please note that the receipt printer here will not work; since we are using print templates for these slips, we must go to the print templates printer).
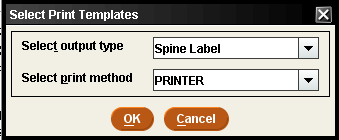
In the Select Print Templates pop up window, use the down arrow in the Select output type to select Holdshelf Slip.

Leave the Select print method on Printer, and click OK.
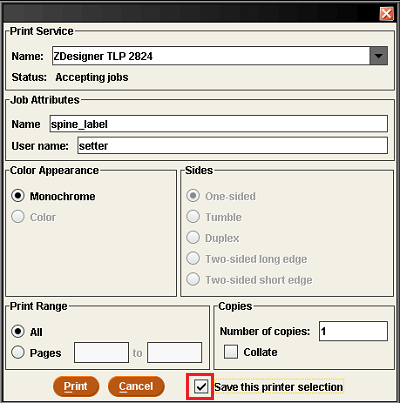
In the Print Service Window, make sure the receipt printer connected to this workstation is in the Name box. If you don’t see it, click on the down arrow for a list of installed printers and choose it from there.
Check the box in front of Save this printer selection.
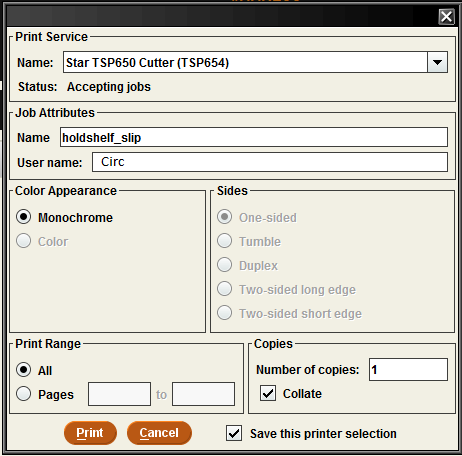
Click Print and this window will close. You are now ready to print holdshelf slips.
Transit Slips
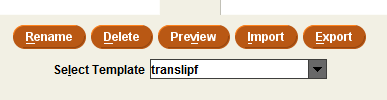
Go to Admin – Settings and click on the Print Templates tab.
In Output Type, use the down arrow to select Transit slip. Check the box in front of Use Print Templates.
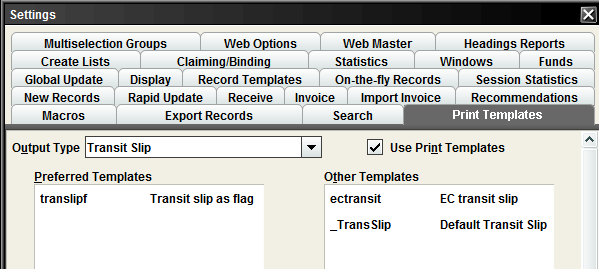
All libraries except Eau Claire use the same tranist slip, translipf, Transit slip as flag.
If it is not already in the left column under Preferred Templates, highlight it in the right column and click the top, left-facing arrow between the columns to move it over to the left.
Then, at the bottom of that screen, use the down arrow for the Select Template field to select the name of the template. Make sure it appears in the box. Click Save Settings. Click OK to close.
To set the printer to send the slips to, go to File – Select Printer – Print Templates (please note that the receipt printer here will not work; since we are using print templates for these slips, we must go to the print templates printer).
In the Select Print Templates pop up window, use the down arrow in the Select output type to select Transit Slip. Please note this is at the bottom of the list, so you will have to use the scroll bar on the right to move the list down so you can select it.
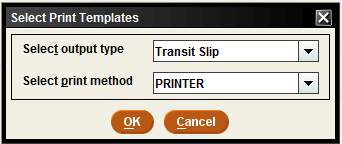
Leave the Select print method on Printer, and click OK.
In the Print Service Window, make sure the receipt printer connected to this workstation is in the Name box. If you don’t see it, click on the down arrow for a list of installed printers and choose it from there.
Check the box in front of Save this printer selection.
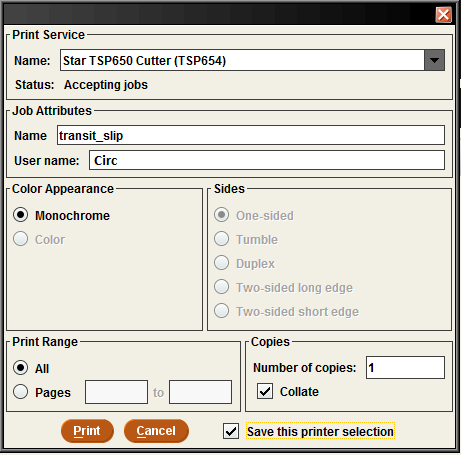
Click Print and this window will close. You are now ready to print transit slips.
Spine Labels
If you are printing spine labels from Sierra, print templates need to be turned on and templates selected for spine labels.
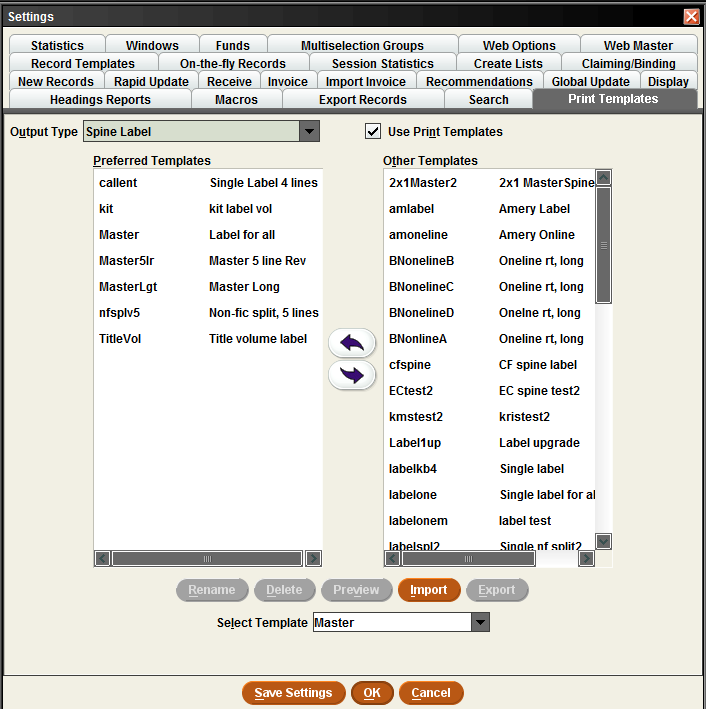
Go to Admin – Settings and click on the Print Templates tab.
Change the Output Type to Spine Label. Check the box in front of Use Print Templates.
From the Other Templates column on the right side, select the templates you want to use and move them over to the Preferred Templates column on the left by clicking on the label name to highlight it, then clicking on the top arrow between the columns. You can move over as many templates as you may want to use.
These are the most commonly used templates and what they are for:
- Master – Label for all This will print almost every type of call number and is recommended as the default.
- MasterLong – For those that print entire names, has room for a couple more characters on the label.
- MasterLP – has larger font, requestde for large print books.
- onelinert – Oneline right aligned This prints the call number in one line and is aligned with the right margin. It is used for Music CDs and thin children’s books when you want the call number to start at the lower edge of the item. It gives labels uniformity by lining up at the lower edge and moving up.
- onelinetop – Oneline top aligned Similar to oneline right aligned only printed along the top of the label; used when trimming is desired so less of the back sheet of a music CD is covered.
- callent – Single Label 4 lines Used for fiction call numbers that have 4 lines.
- Kit – Kit label vol Used for creating labels for book discussion kits
- cfspine – CF spine label This label has a smaller left margin and will print 12 characters across; used by libraries that print the full last name of the author on their fiction spine labels.
- labelspl2 – Single nf split2 Used for non-fiction call numbers where the decimal point and succeeding numbers are printed on a second line below the main Dewey number. This helps in shelf reading for longer numbers so they don’t wrap around the front of the book.
At the bottom of this window there is a Select Template dropdown; here is where you select the template you want to use. Choose Master, and come back here to change it if another label configuration is desired. Click Save Settings, then OK to exit the Settings window.
Select the printer for printing spine labels. Go to File – Select Printer – Print Templates (do NOT select Label printer – that is for printing labels in a way we do not use).
Change Select output type to Spine Label; leave Select print method at Printer. Click OK.
In the Print Service window, make sure the Zebra is listed in the Name box (the actual name will differ depending on which printer model you have); if it is not there, use the down arrow to select it.
Click the box in front of Save this printer selection at the bottom of the window. Click Print.
Spine label printing settings in Sierra are now done. To print a label, the item record must be saved first. Then use Ctrl – L to print. Or, go to Tools – Print spine label. You can also print a spine label from a Summary screen with your item highlighted.
To change templates, go to Admin – Settings, Print Templates tab. Check to see if the template you want to use is in the left column under Preferred templates. If it is not there, find it in the right column and move it over. Then go to the bottom of the screen and in the Select Template field, use the down arrow to select the template you want to use so it shows in the box. Clicking Save Settings will make this your default for the next time you log in. Clicking OK will change the template used for the rest of this session, or until you change it again. To keep changing the template to a minumun, sort your items by the template you’ll need for them and do all of one type together.
For spine labels to print correctly you also need to have the Zebra printer preferences set in the Windows printer file.